
🎨 New to paint pouring? Start here: A Beginner-Friendly Guide to Acrylic Pouring
If you’ve spent any time searching for acrylic paint pouring techniques, you’ve probably noticed there’s no shortage of names out there — dirty pours, Dutch pours, swipes, tree rings — and it can feel like everyone else already knows what these mean except you. I promise, they’re a lot more approachable than they sound.
Every technique on this list comes down to the same basic idea: layer your paint, pour it, and let gravity, gentle tilting, or a tool do the rest. The differences are mostly in how you layer and how you move the paint once it hits the canvas. Once you understand that, the whole list stops feeling like a secret language and starts feeling like a toolbox.
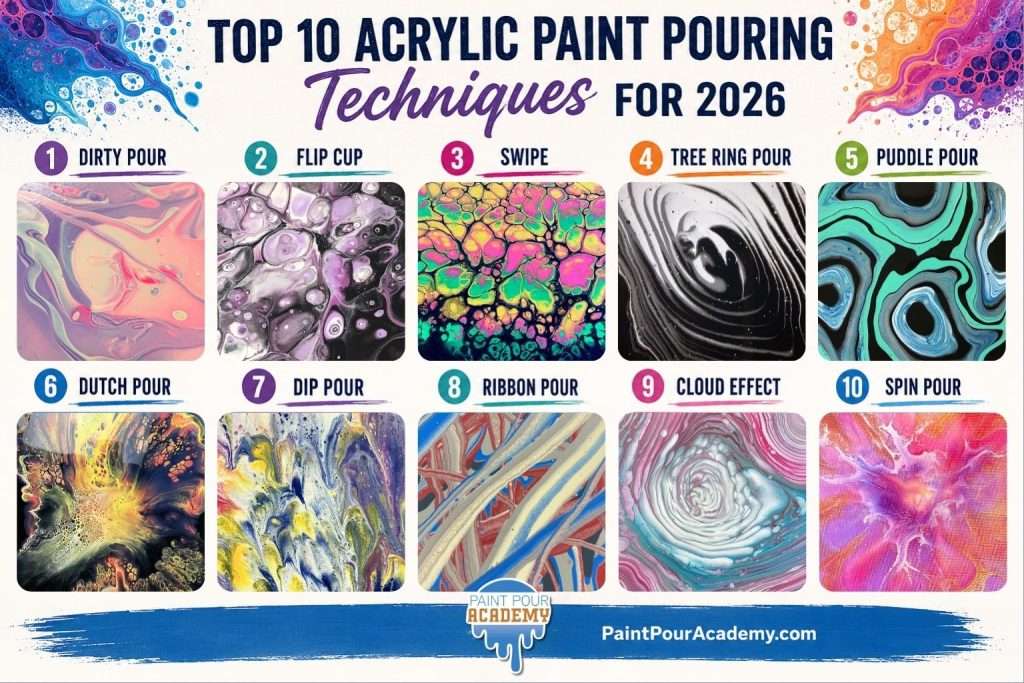
Here are the ten acrylic paint pouring techniques I’d point any artist to in 2026, whether you’re pouring your first canvas or your fiftieth.
1. Dirty Pour
This is the technique most people picture when they think of paint pouring, and it’s a great place to start. You layer several colors of paint, one on top of the other, into a single cup — without stirring them together. When you pour that cup onto the canvas, the layers spread out and interact on their own, creating those signature swirls and cells.
Tip: pour slowly and in one general spot rather than moving the cup around too much. Let the layers do the work.

2. Flip Cup
A flip cup is a dirty pour with one extra step: instead of pouring straight from the cup, you place the cup upside down on the canvas first, then lift it away so the paint releases all at once. This gives you more control over where your paint lands before you start tilting.
Tip: lift the cup slowly and steadily. A jerky lift can cause the paint to splash instead of settle.

3. Swipe
The swipe technique starts with a dirty pour or a series of poured lines, then uses a tool — a palette knife, spatula, or even a baby wipe — to drag across the wet paint. This pulls the colors sideways and can create beautiful cells and texture that a straight pour alone won’t give you.
Tip: one confident swipe usually looks better than several hesitant ones. Paint can get muddy if you swipe the same spot too many times.

4. Tree Ring Pour
One of the most beginner-friendly techniques on this list. You pour rings of color, one inside the other, starting from the center of the canvas and working outward — like the rings of a tree. Then you tilt the canvas to let the rings spread and blend at the edges.
Tip: keep your rings roughly the same thickness so the pattern spreads evenly as you tilt.

5. Puddle Pour
A puddle pour is exactly what it sounds like — you pour small puddles of color directly onto the canvas rather than layering them in a cup first. Because the colors touch on the canvas instead of in the cup, you get a different kind of blending and often more distinct color separation.
Tip: leave a little space between your puddles before you start tilting, so the colors have room to move into each other gradually.


Take the 30-Day Beginner Paint Pour Academy Challenge
Stop wasting paint. Stop muddy colors. Stop guessing.
In 30 days, build real skills and create pieces you’re proud of.
6. Dutch Pour
A Dutch pour uses air, not just gravity, to move your paint. After pouring your paint onto the canvas, you use a hair dryer or straw to blow across the surface, pushing the paint into wild, feathery patterns. It’s one of the more dramatic-looking techniques, and it’s a fun one to experiment with once you’re comfortable with the basics.
Tip: keep the hair dryer moving and hold it a few inches back from the canvas — too close, too long, and the paint can develop tiny craters.

7. Dip Pour
For a dip pour, you flip your canvas upside down and lower it into a container of poured paint, then lift it back out. The paint clings to the canvas as you pull it up, creating a pattern that spreads outward from wherever the canvas first touched the paint.
Tip: lower and lift the canvas slowly and at a steady angle for the cleanest results.

8. Ribbon Pour
A ribbon pour is all about layering thin, even lines of color across the canvas before tilting — like laying ribbons side by side. When you tilt the canvas, those ribbons stretch and blend into long, flowing bands of color instead of the rounder cells you’d see in a dirty pour.
Tip: thinner, more consistent paint tends to stretch into cleaner ribbons than a thicker mix.

9. Cloud Effect
The cloud effect technique layers paint so that the final piece looks like soft, blended clouds rather than sharp cells or lines. It usually involves a gentler pour and less tilting, letting the paint settle into soft transitions on its own.
Tip: resist the urge to tilt too much here — the softness of a cloud effect comes from letting the paint rest.

10. Spin Pour
A spin pour uses a turntable (or a lazy Susan in a pinch) to spin the canvas while wet paint is on it, using centrifugal force instead of tilting to move the paint outward. It’s one of the more unpredictable techniques on this list, which is part of the fun — no two spins ever look quite the same.
Tip: start slow. A canvas spinning too fast can fling paint right off the edge — cover your workspace before you try this one.


Which Technique Should You Try First?
If you’re just starting out, a dirty pour or a tree ring pour is the easiest place to build confidence — both rely mostly on gravity and gentle tilting, so there’s less to manage while you’re still learning how paint consistency and color layering work together. Once those feel comfortable, techniques like the swipe, Dutch pour, and spin pour give you more dramatic effects to experiment with.
None of these techniques require you to get it perfect on the first try. Some of my favorite pieces came from a technique that didn’t go as planned. That’s part of what makes fluid art so much fun — you’re always a little bit surprised by what comes out.
If you’d like a structured way to practice all of these with real guidance instead of trial and error, that’s exactly what the 30-Day Paint Pour Challenge walks you through, one skill at a time.
Start the 30-Day Challenge – just $30!


